A dripping tap is a small job. Keeping track of who reported it, when, how urgent it really is, when the plumber is coming and what it cost is the part that eats an evening. This post walks through how a repair moves through Wealthru, from the tenant's first message to the expense in your books.
What you do without it
Without a shared place for repairs, requests arrive wherever the tenant happens to reach you. A text at night, a voicemail, a comment in passing at the door. You keep the list in your head or in a notes app, you confirm the visit in another text thread, and when the invoice arrives you enter the cost somewhere else again. Months later, when the same tap drips, nobody can say what was done last time.
Provincial rules also put repair duties on landlords, and a dated record of when you were told and what you did is the thing you want if a dispute ever comes up. Ontario's Renting in Ontario: your rights and British Columbia's repairs and maintenance page explain the obligations in each province.
This is tooling, not legal advice.
What Wealthru does instead
Every repair becomes one request with its own history. The tenant, you and anyone on your team see the same record.
Step 1. The tenant reports it
A tenant signs in to their portal, taps Maintenance, and fills in the Report a maintenance issue panel. They describe the problem and choose How urgent is it? from options that describe what is happening rather than a number. If they rent more than one home from you, they pick which one. Their request appears straight away under Your maintenance requests, so they know it arrived.
If a tenant phones you instead, you can log the request yourself from New request, so the phone call ends up in the same list as everything else.
Step 2. You see it and triage it
New requests alert you in the app, and by email or text depending on your notification settings. A manager assigned to specific properties is only told about requests on those properties.
Open Maintenance to see every request in one list, with the unit, priority, date reported, visit and status side by side.
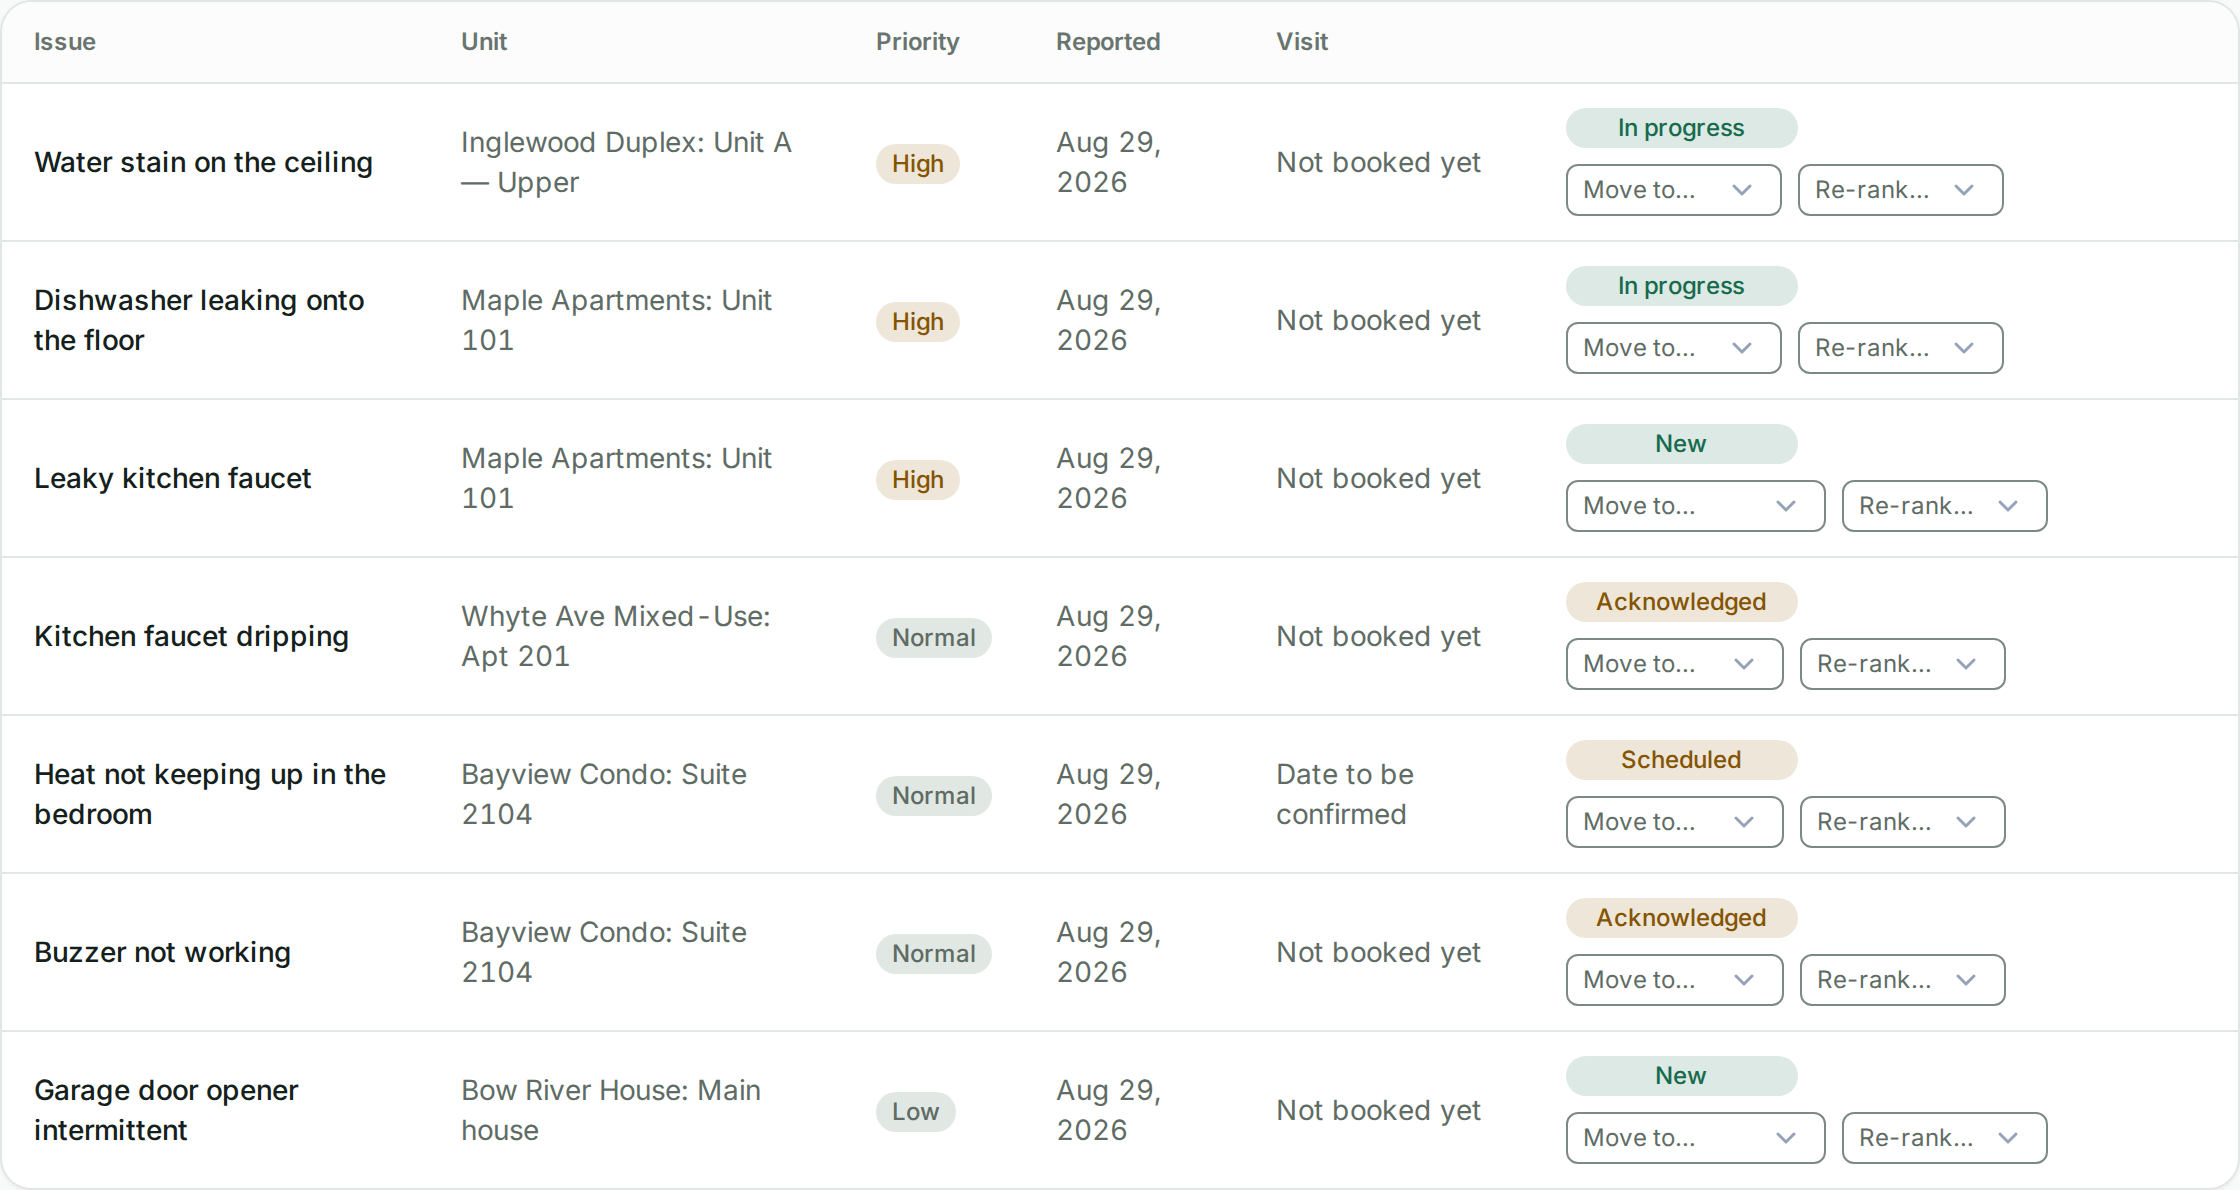
Triage is the point of this screen. Use Re-rank when the reporter got the urgency wrong, because a leaky tap that turns out to be a burst pipe should say so. Raising a request to Urgent or High alerts your team again. Use Move to to change its status as the work moves along.
Step 3. Book the visit
Once you have acknowledged a request, Book the visit appears. Set the date and time you agreed with the trades, and the tenant is told the actual date, not just the word "scheduled". Until then, their copy reads Not booked yet, which is honest and saves a follow-up text asking when someone is coming. The booked visit stays on the record after the work is done.
Step 4. Talk on the request, not around it
Comments live on the request. The tenant sees your replies on their copy and can answer, and each of you is notified when the other replies or the status changes. The whole conversation about that repair stays in one place.
Step 5. Log the cost
When the job is finished, choose Log the cost. It takes you straight to the property's expense form, so the repair lands in your books and, at year-end, in your tax package. Closing the request keeps it on the property and tenant history for next time.
Which plan you need
Maintenance requests, triage, booking visits and comments are on every plan, including Free.
Try it
The step by step help article covers each control, with fixes for the common snags, and tenants have their own guide on how to report a maintenance issue. The operations feature page shows how maintenance sits beside rent, leases and the rest of your dashboard.